

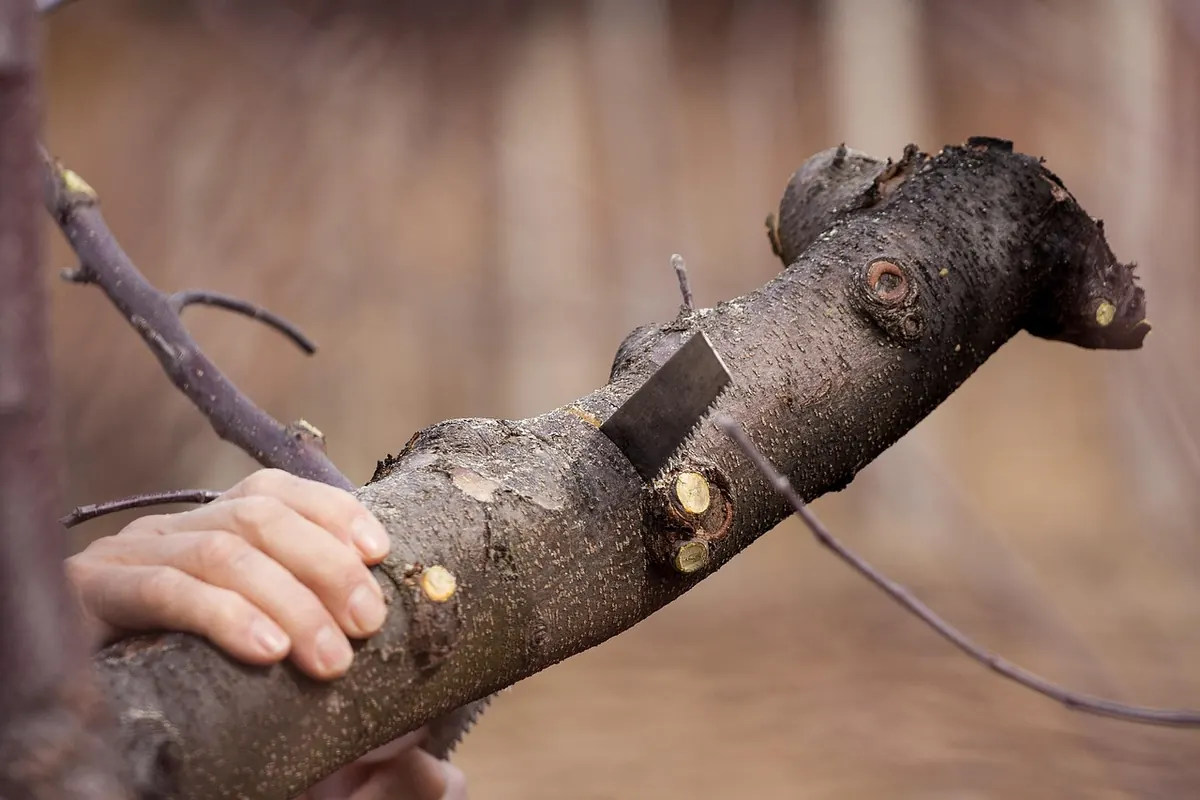
A young fruit tree is not a smaller version of an old one. It is a structure under construction. The branches you keep in the first three years will carry fruit for decades, and the ones you remove now are far easier to remove than they will be later. Pruning at this stage is less about a tidy shape and more about choosing a strong, open frame that lets light in and keeps the tree from fighting itself.
The work is not complicated, but it is deliberate. You will make a few decisive cuts, leave most of the growth alone, and resist the urge to fix everything in one winter. A tree pruned calmly over three seasons will outgrow and outlast one that was cut hard in a single afternoon of enthusiasm.
Why the First Three Years Are Structural
The first three years set the tree’s permanent scaffold. A branch that is crowded, weak-angled or badly placed now will still be crowded, weak-angled or badly placed when the tree is mature. Correcting it later means removing a large limb and setting the tree back. Correcting it now takes a small cut and a few minutes.
Branch angles matter more than most gardeners expect. A limb that leaves the trunk at a narrow, steep angle traps bark in the crotch and forms a weak joint; under the weight of a heavy crop or a wet snow, it can split away and take a strip of trunk with it. A limb that leaves at a wide, open angle—roughly the angle of a clock hand at four o’clock—knits onto the trunk with strong wood and carries weight well. You can see the difference in a mature orchard: the trees with wide crotches are still standing, and the ones with narrow crotches are the ones with the scars.
Two ideas explain most of what happens. A heading cut—shortening a branch to a bud—encourages growth below the cut. A thinning cut—removing a branch at its base—leaves the rest of the tree calmer. Young trees are full of energy, so heavy heading produces a thicket of upright shoots. Aim for thinning where possible and heading only when you need to redirect a leader or fill a gap.
Timing matters. Most dormant pruning is done in late winter, just before growth begins. Avoid cutting when wood is frozen or when a hard freeze is forecast. Stone fruits such as plum, cherry and peach are often pruned in early summer or after harvest in many regions, because winter wounds can be slower to heal and because silver leaf and similar diseases are more likely to enter through dormant cuts. If you are unsure about your climate, ask a local grower or extension service.
Before You Make the First Cut
Use bypass pruners for small branches, loppers for medium ones, and a pruning saw for anything larger than your thumb. Sharp, clean tools make clean wounds. Sharpening once before the season takes five minutes and saves you a great deal of bruising and torn bark. Clean the blades with a household disinfectant between trees, and especially after touching any wood that looks diseased. Do not use wound paint; it is not necessary for routine pruning and can trap moisture.
Find the branch collar—the slight swelling where a branch meets the trunk. Make your cut just outside it, not flush with the trunk and not leaving a long stub. On a larger branch, use the three-cut method: first a shallow cut underneath, then a cut from above a little farther out, then a final clean cut at the collar once the weight is off. This prevents the branch from tearing bark as it falls.
It also helps to know what you are working with. A tree on a dwarfing rootstock will stay small and fruit early; the same variety on a vigorous rootstock will spend its first years building wood and fighting your secateurs. Pruning cannot change the rootstock, so match your ambition to the tree in front of you. A vigorous tree needs a little more thinning to slow it down; a weak one needs encouragement and restraint.
Before cutting anything, walk around the tree. Look for dead, diseased or damaged wood; branches that cross or rub; and shoots that grow straight up from the trunk or along a limb. Those are your first removals. Then step back and decide which branches will form the permanent framework. Do this from all four sides, because a tree that looks balanced from the front door can be lopsided from the fence.
Year One: Build a Trunk and Choose a Direction
In the first dormant season, your job is to establish a leader and, if the tree has side shoots, choose the first scaffolds. A bare-root whip may have no side branches at all. In that case, shorten the trunk to a bud at about knee height—or follow the nursery’s recommendation for your species—so the tree breaks into growth lower down. Choose the uppermost strong shoot as the new leader and select three to five well-spaced shoots below it as your first branches.
If you are growing a central-leader tree, such as many apples and pears, keep one upright leader and remove any shoot that competes with it. If you are growing an open-centre tree, such as many stone fruits, cut the leader back to an outward-facing bud and keep three or four branches that grow away from the centre.
- Remove the obvious first. Dead, broken, diseased and rubbing branches come out before any shaping cut.
- Choose one leader. Keep the strongest, straightest shoot with good placement. Remove a rival leader rather than shortening it and leaving a stub.
- Select three to five scaffolds. Space them around the trunk, not all on one side, with a hand’s width or more between them. Wide branch angles are stronger than narrow ones.
- Take out low and crowded growth. Remove shoots that are too low, too upright, or too close to a better branch.
- Stop when the frame is clear. Do not tip every remaining branch. Leave young branches to extend and thicken.
If the tree is already feathered with side branches, keep the best three or four and remove the rest. It is tempting to keep more in case one fails, but crowded scaffolds become permanent problems. A good rule of thumb is that no branch you keep should be thicker than about half the diameter of the trunk at the point where it joins; a thicker limb will always dominate and steal the leader’s vigour.
Year Two: Strengthen the Frame and Manage Vigour
In the second dormant season the tree will have grown noticeably, and the scaffolds you chose will have extended. Your job now is to protect the leader, keep the chosen branches in balance, and remove the shoots that grew in response to last year’s cuts. Young trees respond to pruning with vigour, so expect a flush of upright growth near the trunk and around wound sites. These are usually the first things to go.
Check the leader first. If a shoot has grown up beside it and is nearly as strong, remove that competitor entirely; do not shorten it, or it will simply push out two more. Then look at the scaffolds. If one is charging ahead while the others sulk, you can slow it slightly by removing a bit of its end growth or by bending it outward and tying it to a stake. Widening a branch reduces its vigour and encourages fruit buds, which is a gentler correction than cutting.
- Remove watersprouts and suckers. Pull or cut shoots growing straight up from the trunk or from the roots. Rub off any that emerge low down while they are still small.
- Thin crowded growth on scaffolds. Where two shoots compete along a branch, keep the one that continues the line outward and remove the other.
- Keep the centre open. Remove shoots that grow inward toward the trunk. The middle of the tree should catch light, not shade.
- Leave the branch ends alone. Unless a scaffold is badly out of balance, do not tip it. Let it reach.
- Remove crossing branches. Anything that rubs will wound, and a wound that never dries is an invitation to rot.
A light summer pass in late June or early July can help a very vigorous tree. Pinching or cutting back the strongest upright shoots then—rather than waiting for winter—removes their energy while the tree is still growing and reduces the mess you will face in the dormant season. Keep this light. Summer pruning done heavily can shock a young tree and push it into regrowth you did not ask for.
Year Three: From Training to Maintenance
By the third year the frame is mostly decided. The scaffolds are established, spaced and angled well, and the leader is clearly dominant. Your pruning shifts from construction to upkeep: you are now maintaining light, balance and airflow, and beginning to think about where fruit will form.
Work through the tree in the same order as before—dead, damaged, diseased, crossing, then structural—and remove less than you think you should. A young tree in its third year needs perhaps a dozen cuts, not a hundred. If you stand back and cannot see obvious problems, put the saw away.
Apples and Pears
Most apples and pears carry fruit on short spurs produced on older wood, so the aim is to build a calm, well-lit branch structure and leave it alone to form spurs. Remove the upright shoots that crowd the centre, keep the branch tips extending gently outward, and resist the urge to shorten long branches just to make the tree look neat—each heading cut costs you a season of fruiting wood.
Stone Fruits
Plums, cherries, peaches and nectarines are different. Many of them fruit on one-year-old wood, or on spurs that have a shorter useful life, so they need regular renewal. Keep a supply of young shoots along the scaffolds and remove some of the oldest, tired growth each year to encourage replacements. With peaches in particular, the fruiting wood migrates outward along the branch, so you are always pruning back to a younger shoot that will bear next season.
If the tree flowers or sets a few fruit in its third year, enjoy the sight but consider removing the fruit before it swells. A young tree that spends its energy on a heavy crop has less to put into roots and frame, and the difference shows for years afterward.
Common Mistakes to Avoid
Most young-tree problems come from good intentions applied too vigorously. If you avoid the following, you will be ahead of most gardeners.
- Pruning too much at once. Removing a third of the canopy on a young tree pushes a burst of upright regrowth that you will spend the next two winters cutting out.
- Heading every branch. A tree tipped all over becomes a dense, twiggy bush with little light in the middle and little fruit.
- Leaving stubs or cutting flush. A stub dies back and invites rot; a flush cut removes the collar the tree needs to seal the wound.
- Keeping narrow-angled limbs. They look fine until the first heavy crop. Choose wide angles now, while the choice is cheap.
- Pruning stone fruits in midwinter. In most regions, wait for early summer or after harvest.
- Using blunt tools. Torn bark heals slowly and gives disease a way in.
- Ignoring the rootstock. A vigorous tree will always be vigorous. Work with it rather than against it.
Aftercare for a Newly Pruned Tree
Pruning is a wound, however small, and a young tree needs a little help afterward. Clean up the cuttings, especially any that show disease, and burn or bin them rather than leaving them at the base of the tree. Rake up fallen debris to remove overwintering pests and spores.
Water the tree during dry spells in its first two or three summers—roots establish slowly, and a drought in July can undo a winter of good pruning. Keep a mulch ring around the base, but pull it back from the trunk so the bark stays dry. Stake only if the tree needs it, and check ties each season; a tie that bites into the bark does more harm than a little movement.
Do not follow a hard pruning with a heavy dose of nitrogen fertilizer. The tree will already be inclined to push regrowth; feeding it more simply makes the thicket thicker. A modest mulch and steady moisture are enough. And in the weeks after cutting, watch the wound sites: shoots that sprout there can be rubbed off with a thumb while they are still soft, which is far easier than cutting them out next winter.
The Long View
Pruning a young fruit tree well is mostly a matter of restraint. You are not shaping a hedge or tidying a border; you are choosing a handful of good branches and then getting out of the way. A tree that was pruned lightly but thoughtfully in its first three years will have wide, strong crotches, an open centre, and enough young wood to fruit generously for decades.
Keep your tools sharp, your cuts few, and your visits regular. The tree will do the rest.
Photo: aXer1 / Pixabay